Plausible Lab: Part #1 – Workbenches
Given my lack of woodworking experience, I wanted a simple, sturdy design that could be built with only a drill and some simple tools. Thus, the design I used can be built with only screws, metal brackets, and pre-cut lumber, and it’s based entirely on eyeballing David L. Jones’ work benches in his awesome new lab. Any stupid design decisions are, of course, my own. If you haven’t yet discovered David’s EEVBlog, check it out! It’s worth watching!
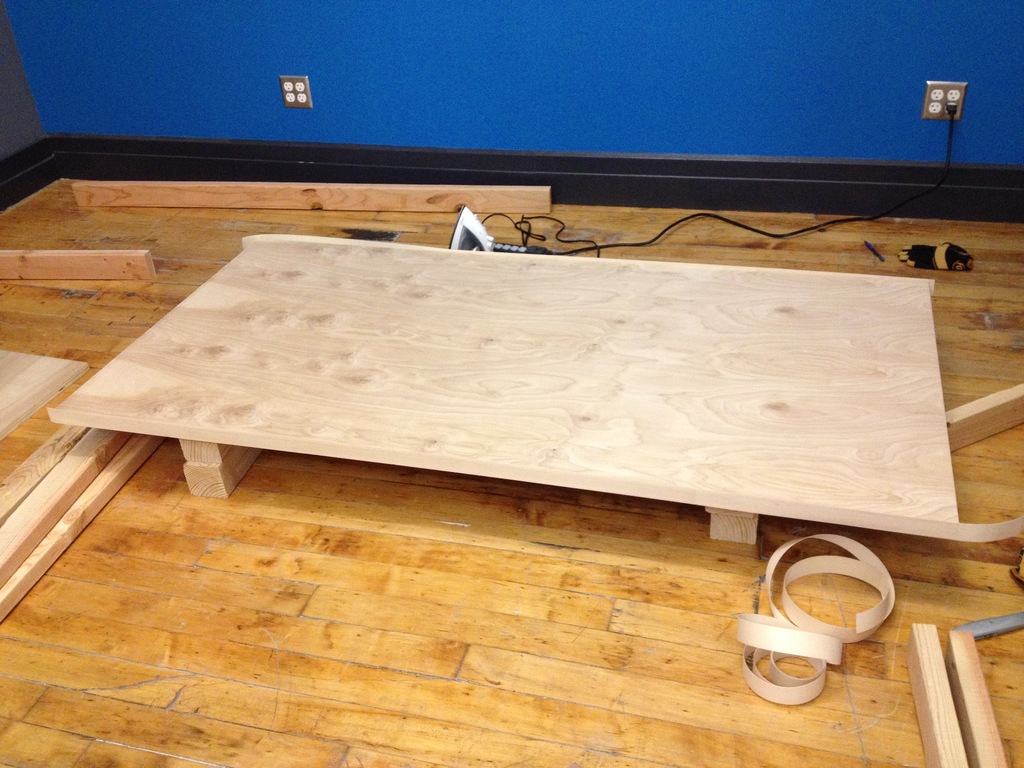
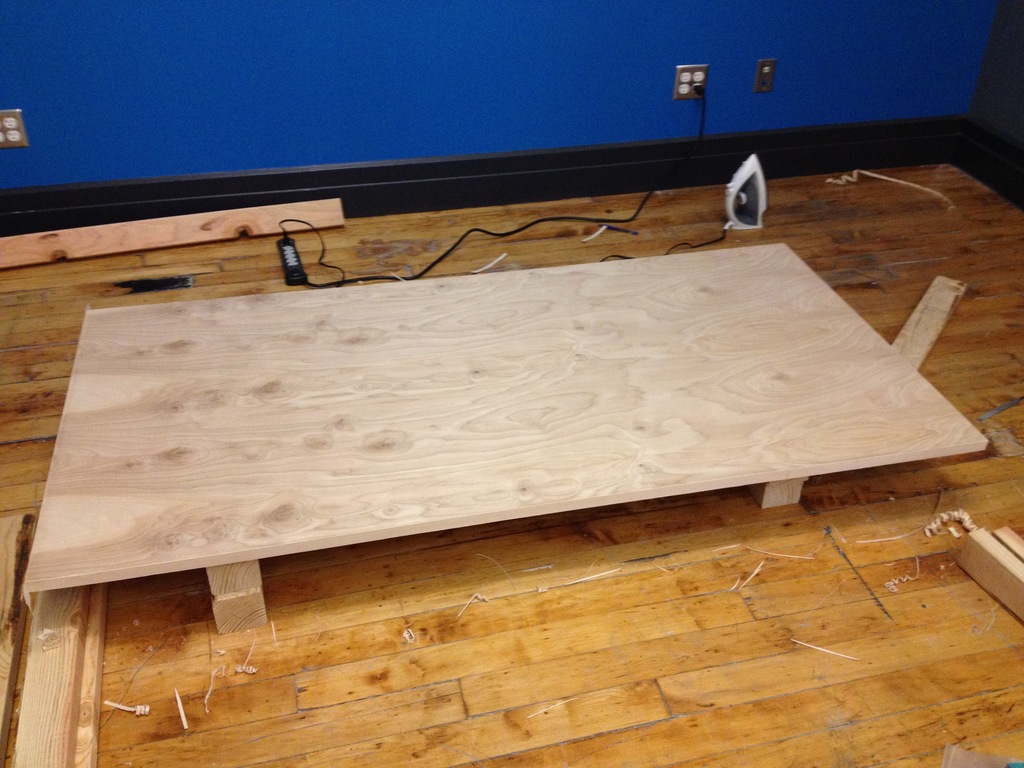
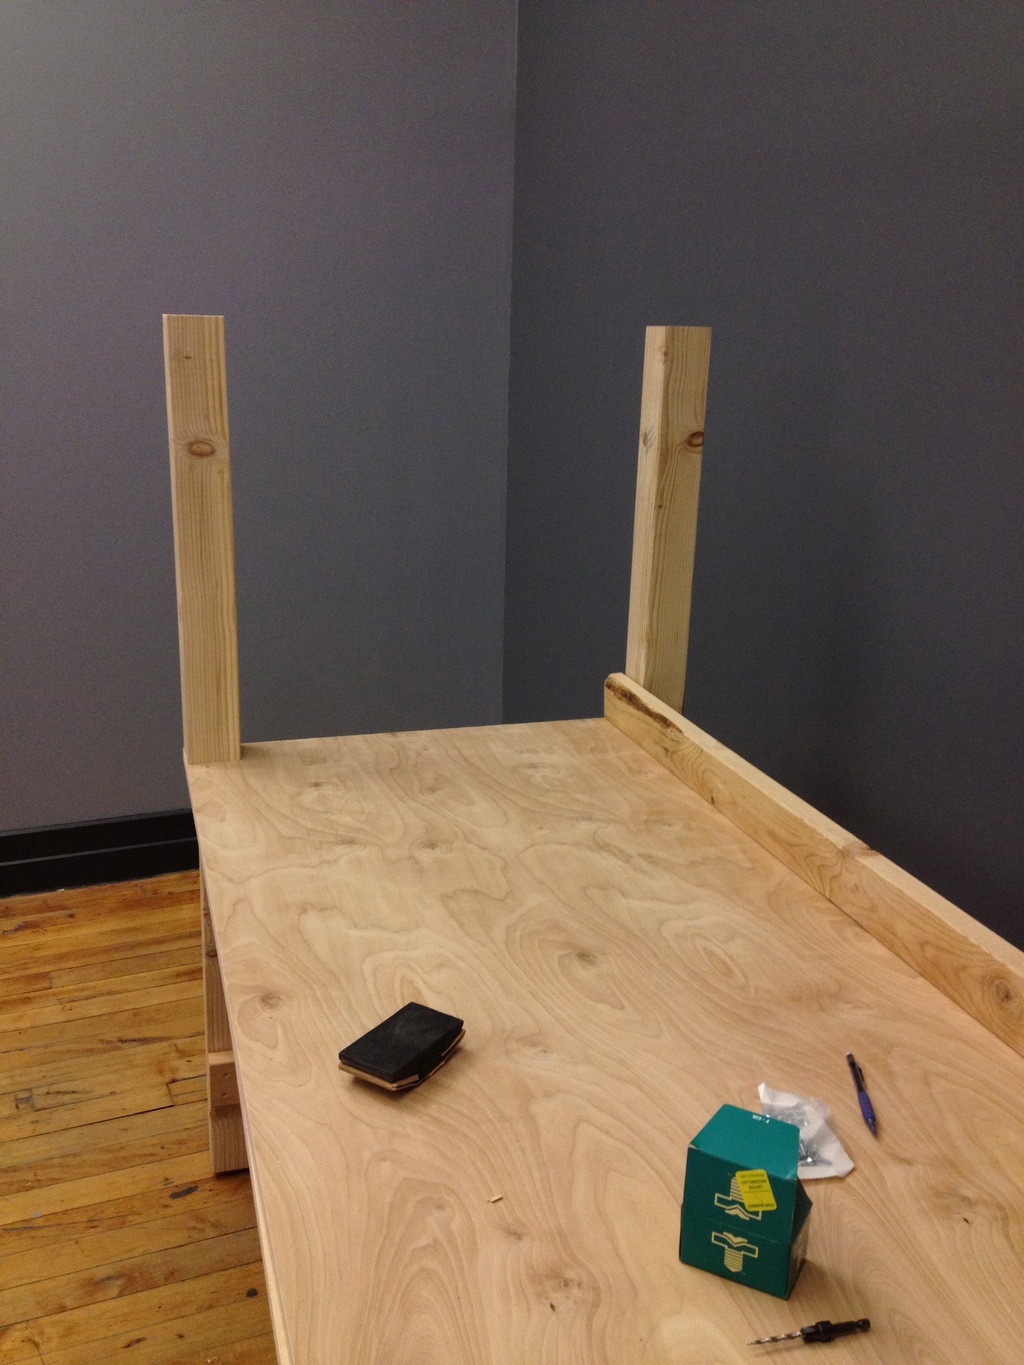
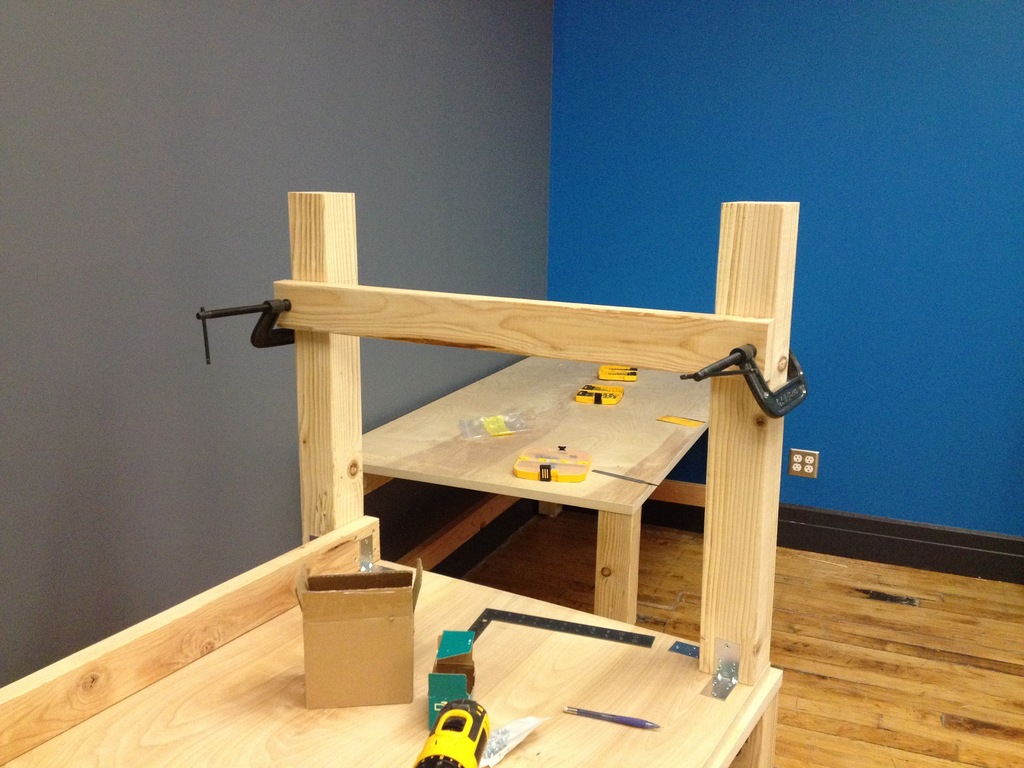
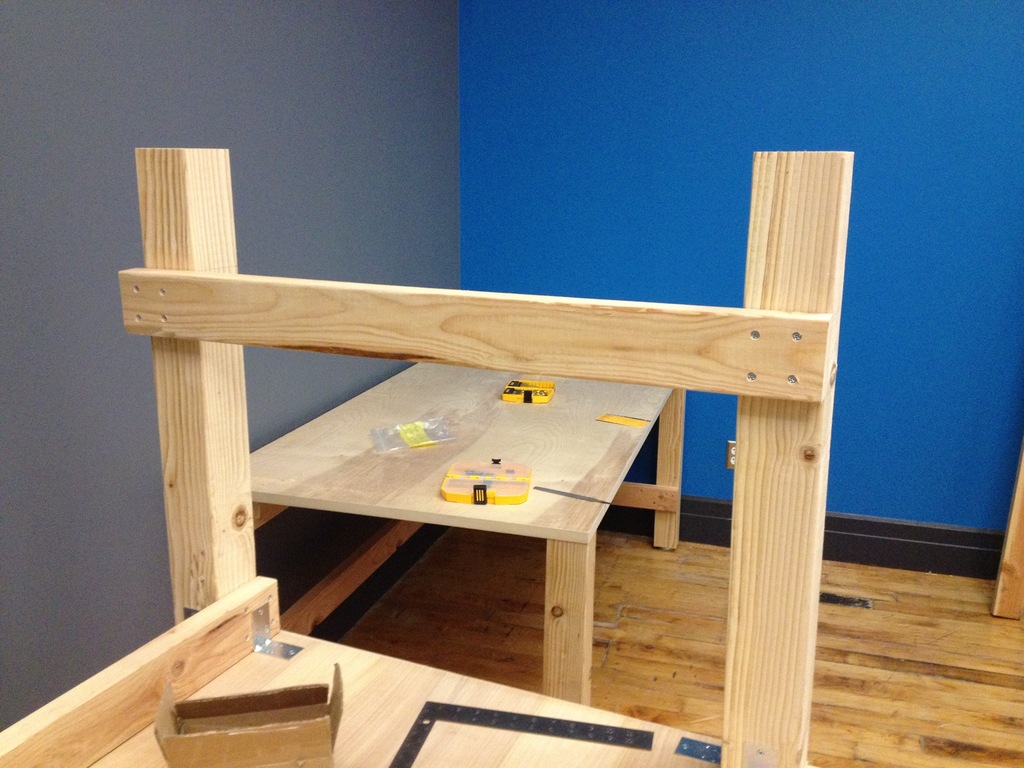
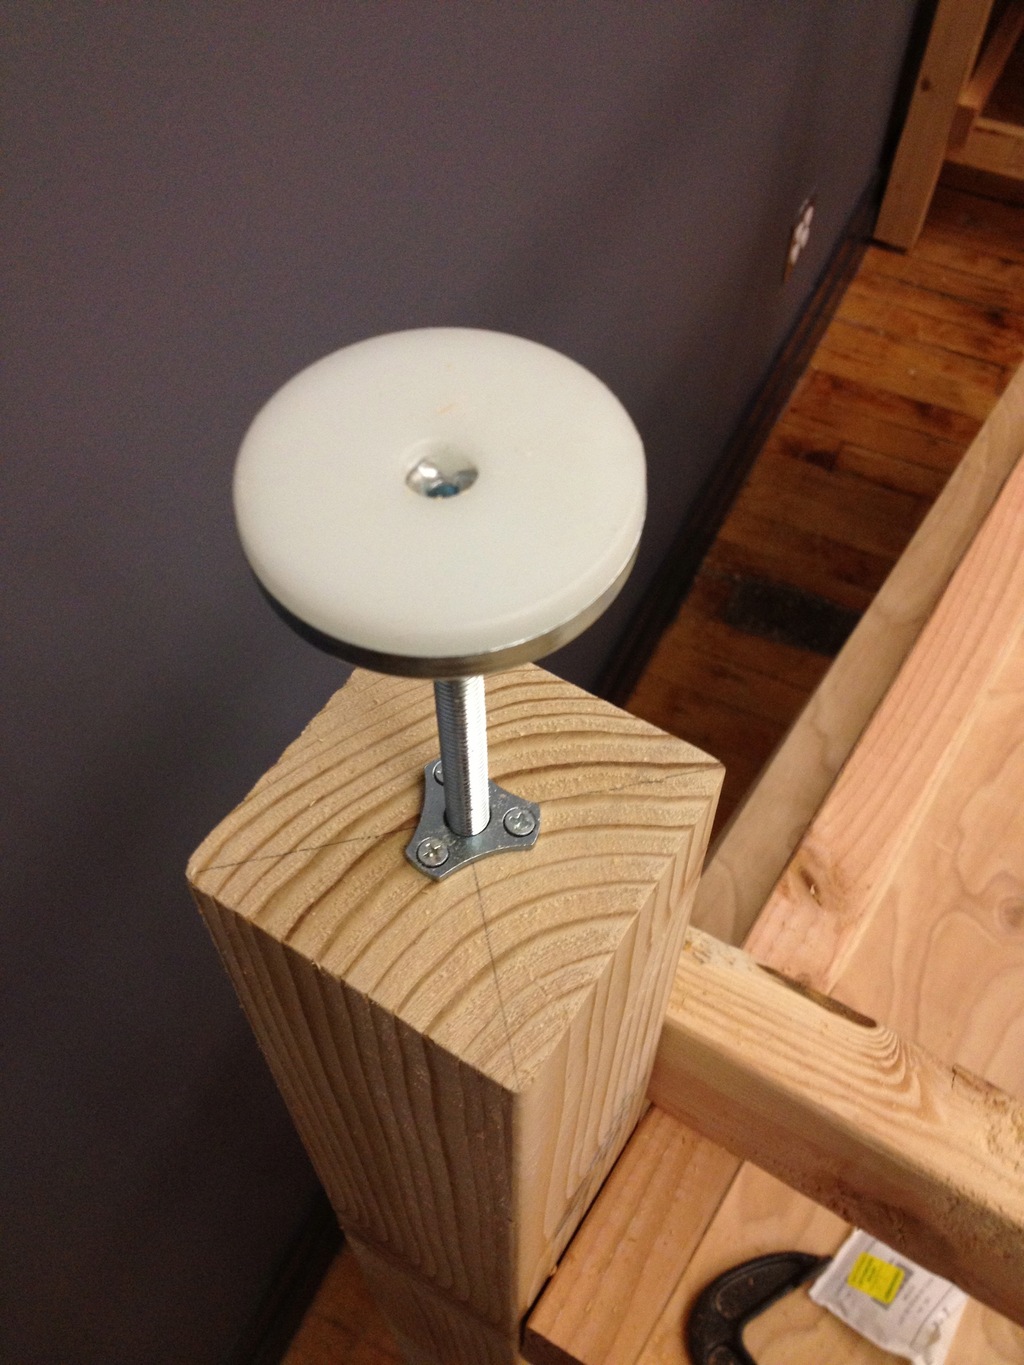
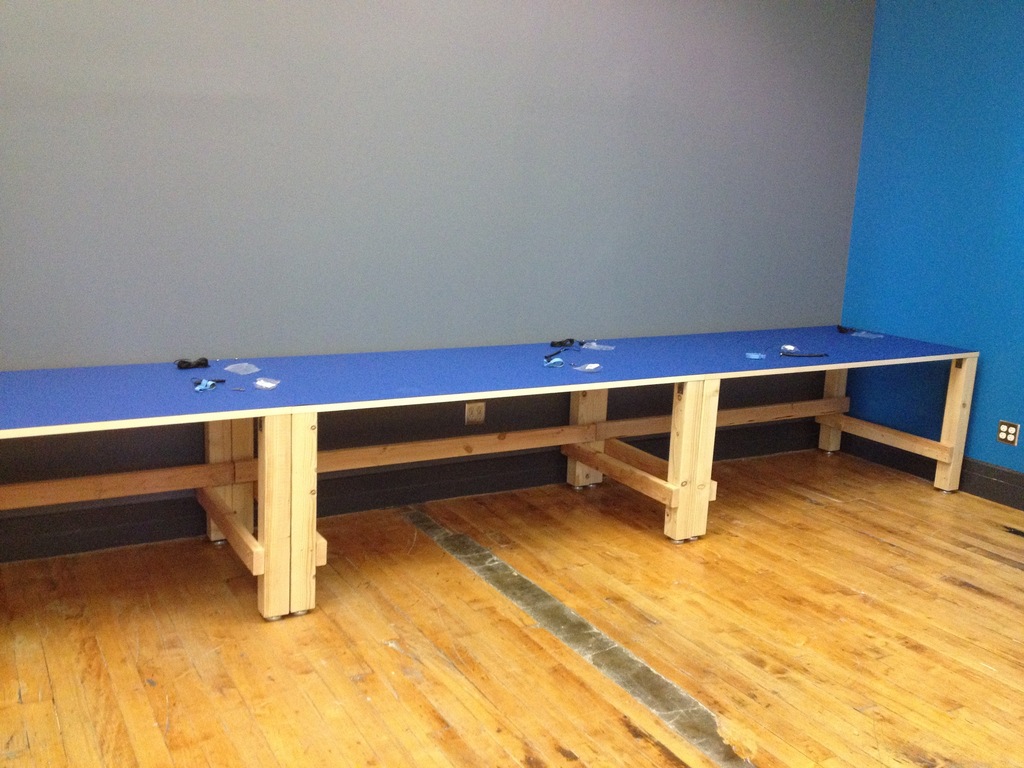
In terms of design, the 18′ work surface is composed of three individual benches, each topped by 6′ by 3′ of Canadian Birch plywood. I kept the tables separate just in case we ever want to re-organize the room by breaking up the large bench. I also decided to use 30″ high surface, rather than a higher standing/stool height, but I did include adjustable feet that can raise the surface a bit. If we find ourselves really wanting a higher bench, I might have to get a bit clever to modify these.
Each bench is covered with rubber ESD mats, conveniently sold by All-Spec in matching 6′ x 3′ sizes. If you’re not familiar with ESD mats, they’re used to help prevent ESD damage to components by bleeding off any electrostatic charge through their dissipative top layer, via their conductive bottom layer. The rubber surface itself is a tough, heat-resistent material, which is perfect for a work bench on which you’ll be dealing with hot soldering irons, sharp objects, and occasional chemicals. You can see the blue mats on the benches in the photo above, although I’ve yet to attach them to ground.
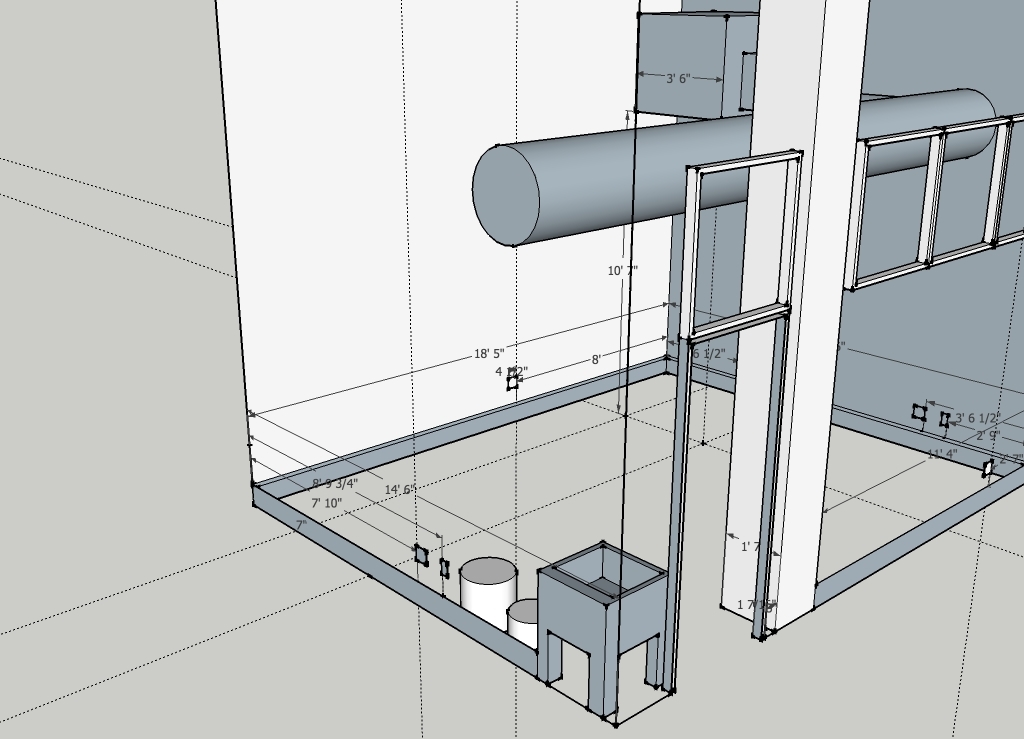
Here’s the design I sketched out for the benches:

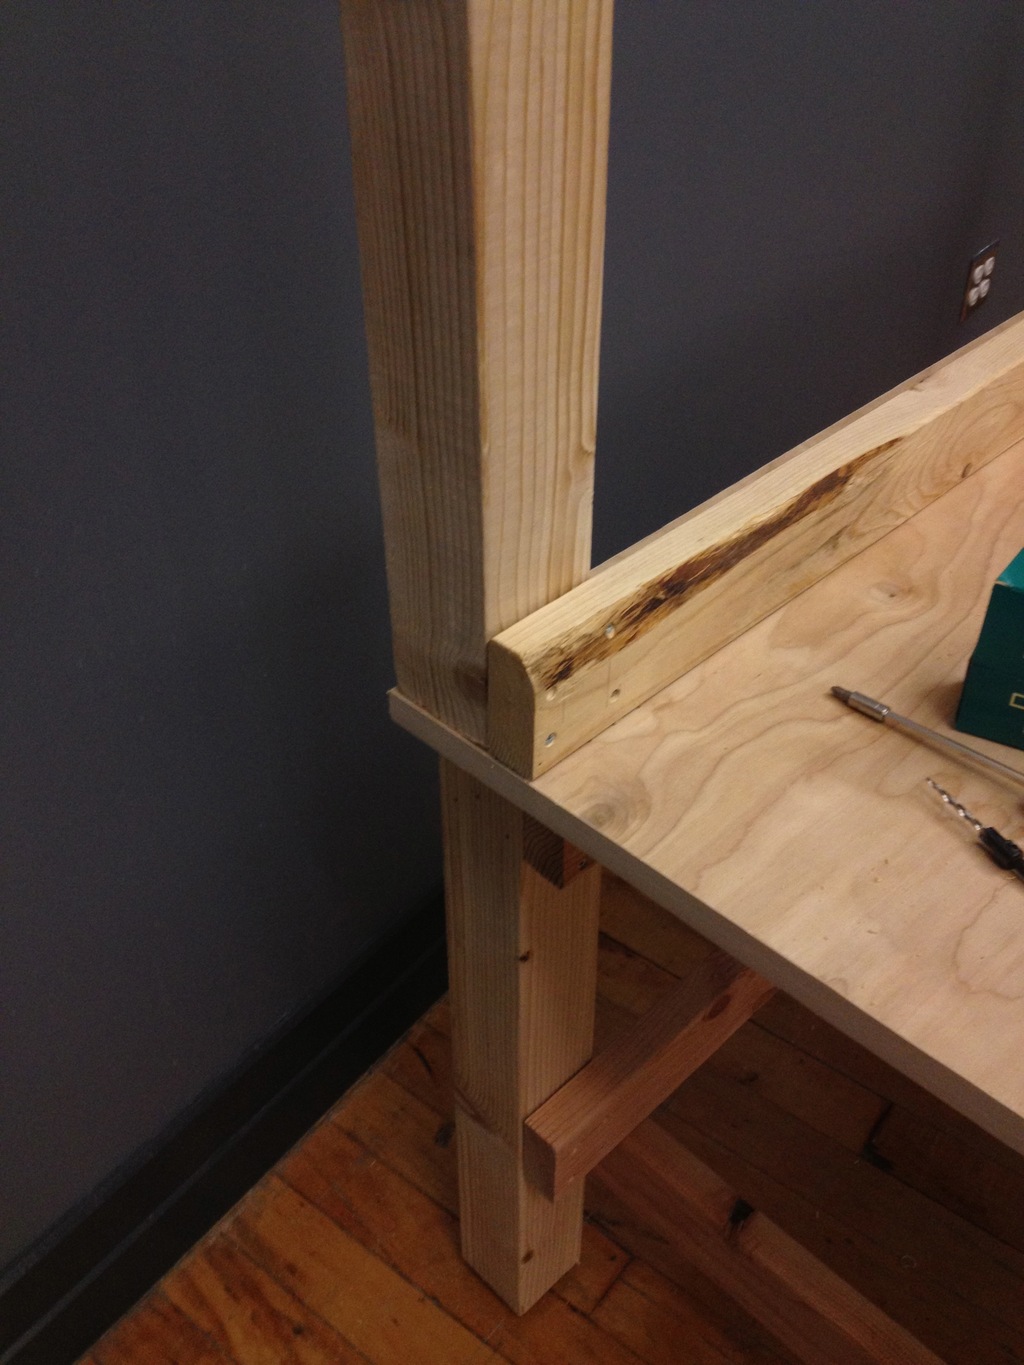
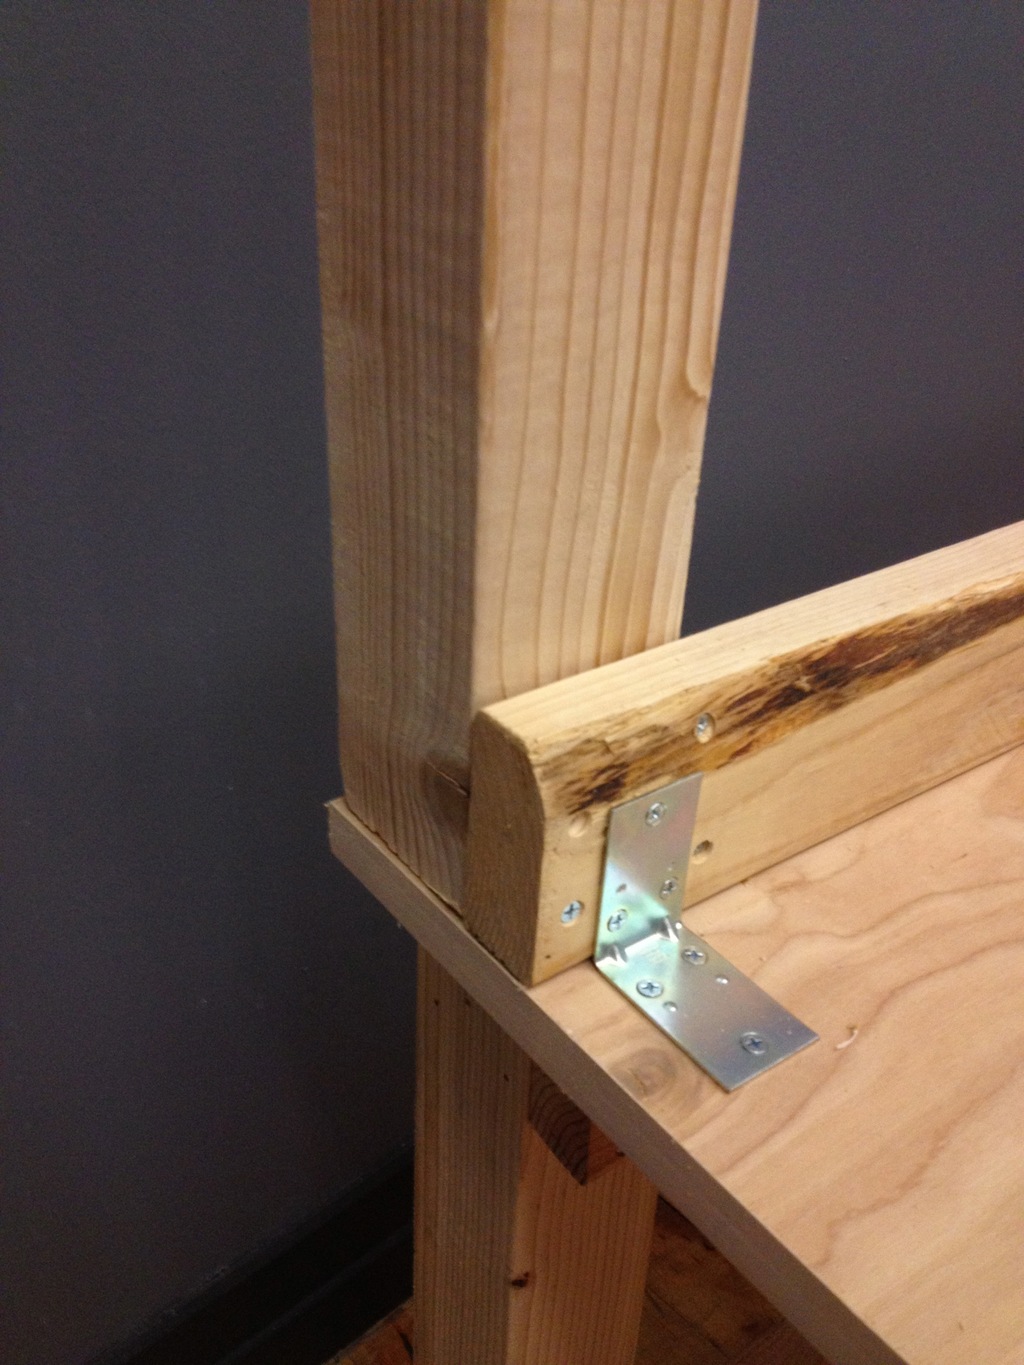
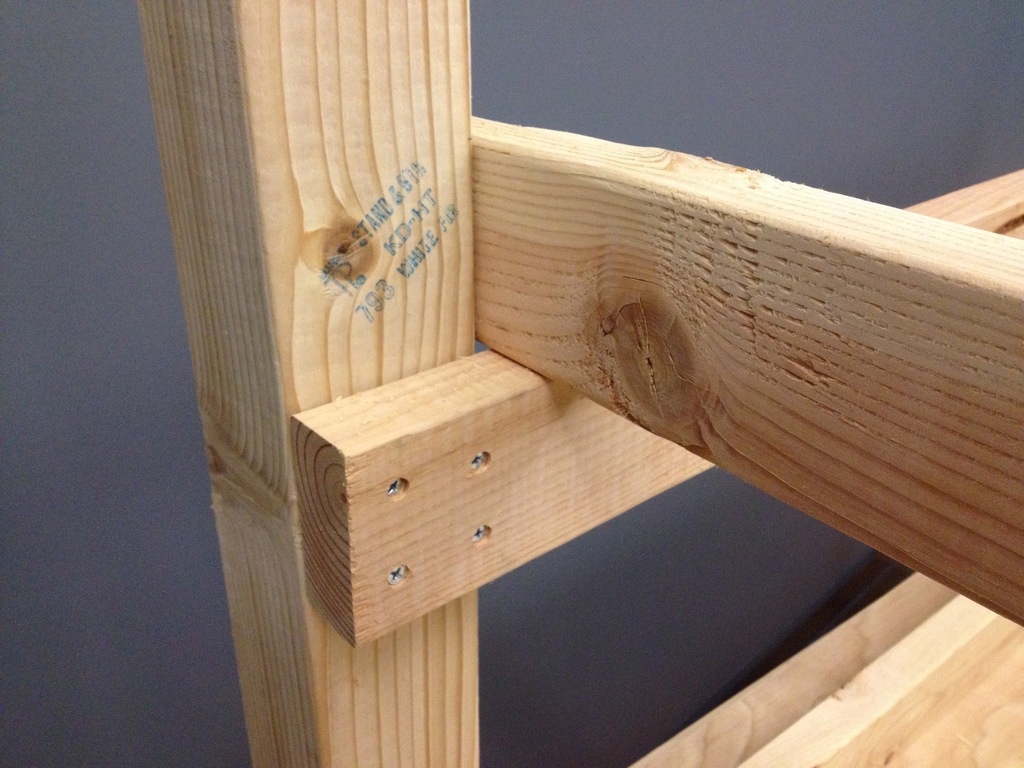
In the final build, I moved the top support beam up to sit flush with the desk surface, to help prevent the plywood from bowing across the rather long 6′ span. Given the number of supports and the size of the lumber, the benches are ridiculously sturdy — possibly more so than they have to be.
If you’d like to replicate these benches (or some variation), I’ve included my parts list below. Additionally, you can browse the gallery of photos I took while building the benches.
Parts List
Lumber & Plywood
You can pick up the lumber and plywood for these benches at your local lumber yard. Here in Brooklyn, I went to Lumber City & Building Supply, based in my neighborhood in Williamsburg. They cut all the wood to size and delivered to our loading dock the next business day, which saved me a ton of work, and meant I didn’t need any power tools besides my drill.
Be aware that lumber uses nominal sizes, which you need to take into account when sketching out your own designs. A 2″ by 4″, for instance, is usually more like 1.5″ x 3.5″.
For each bench as described above, you’ll need the following lumber:
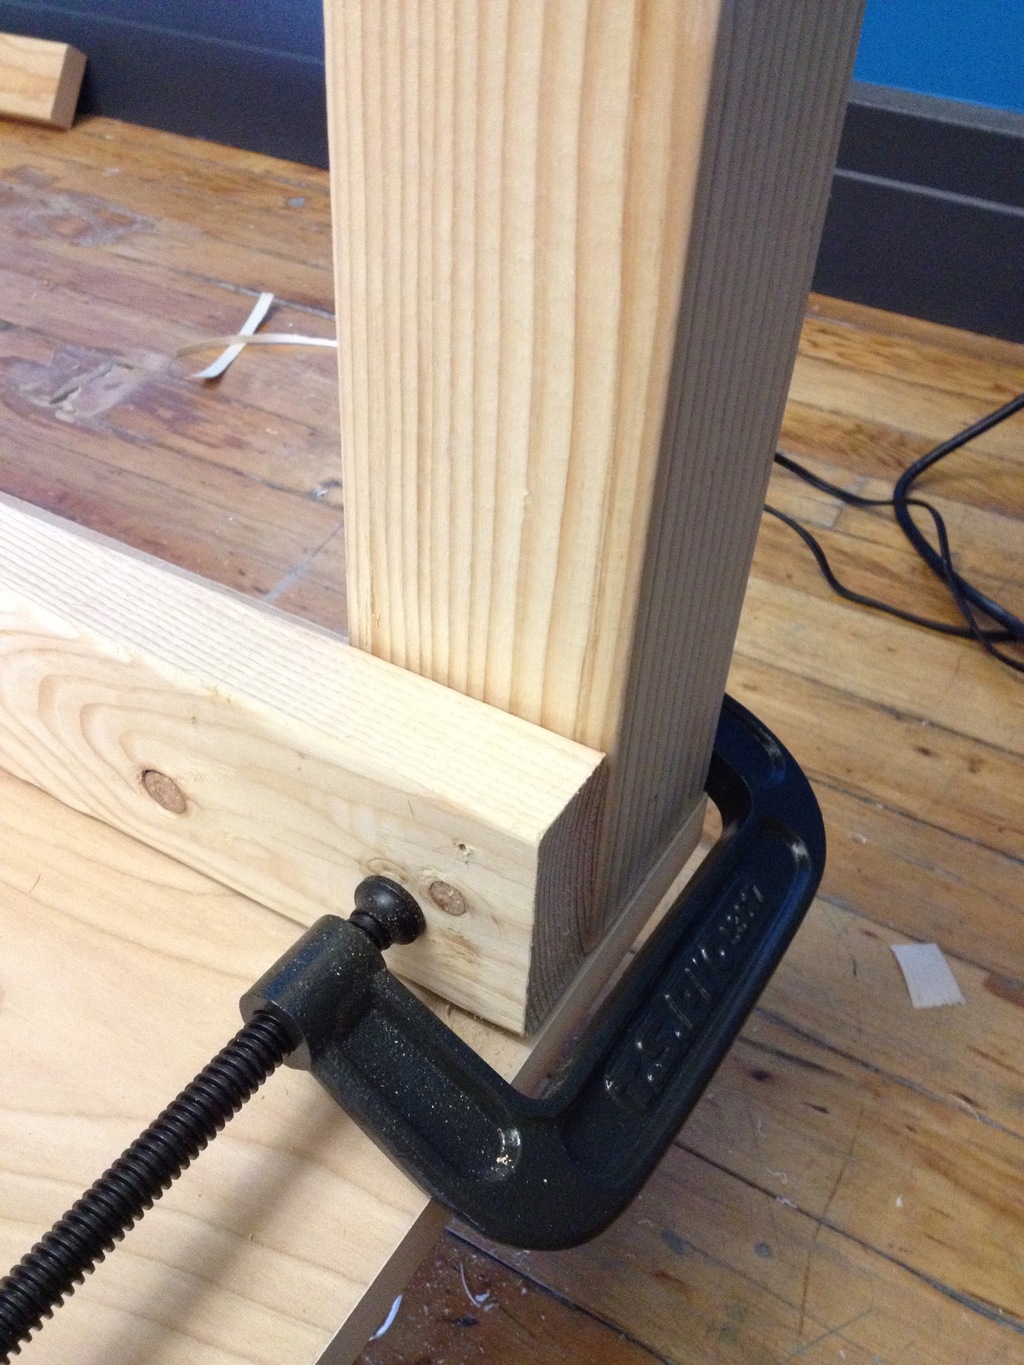
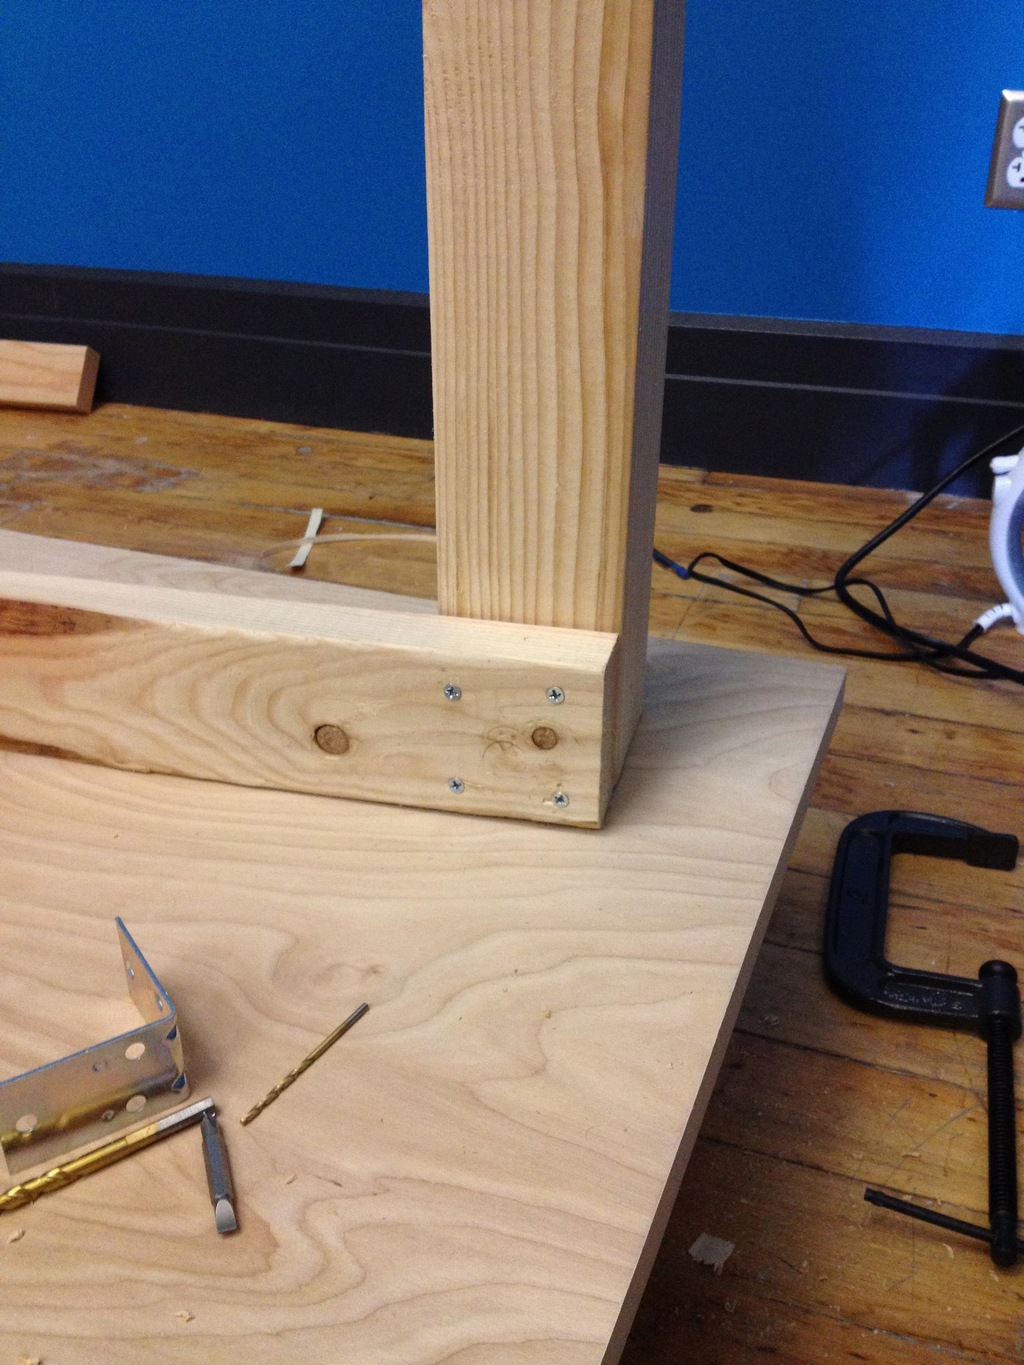
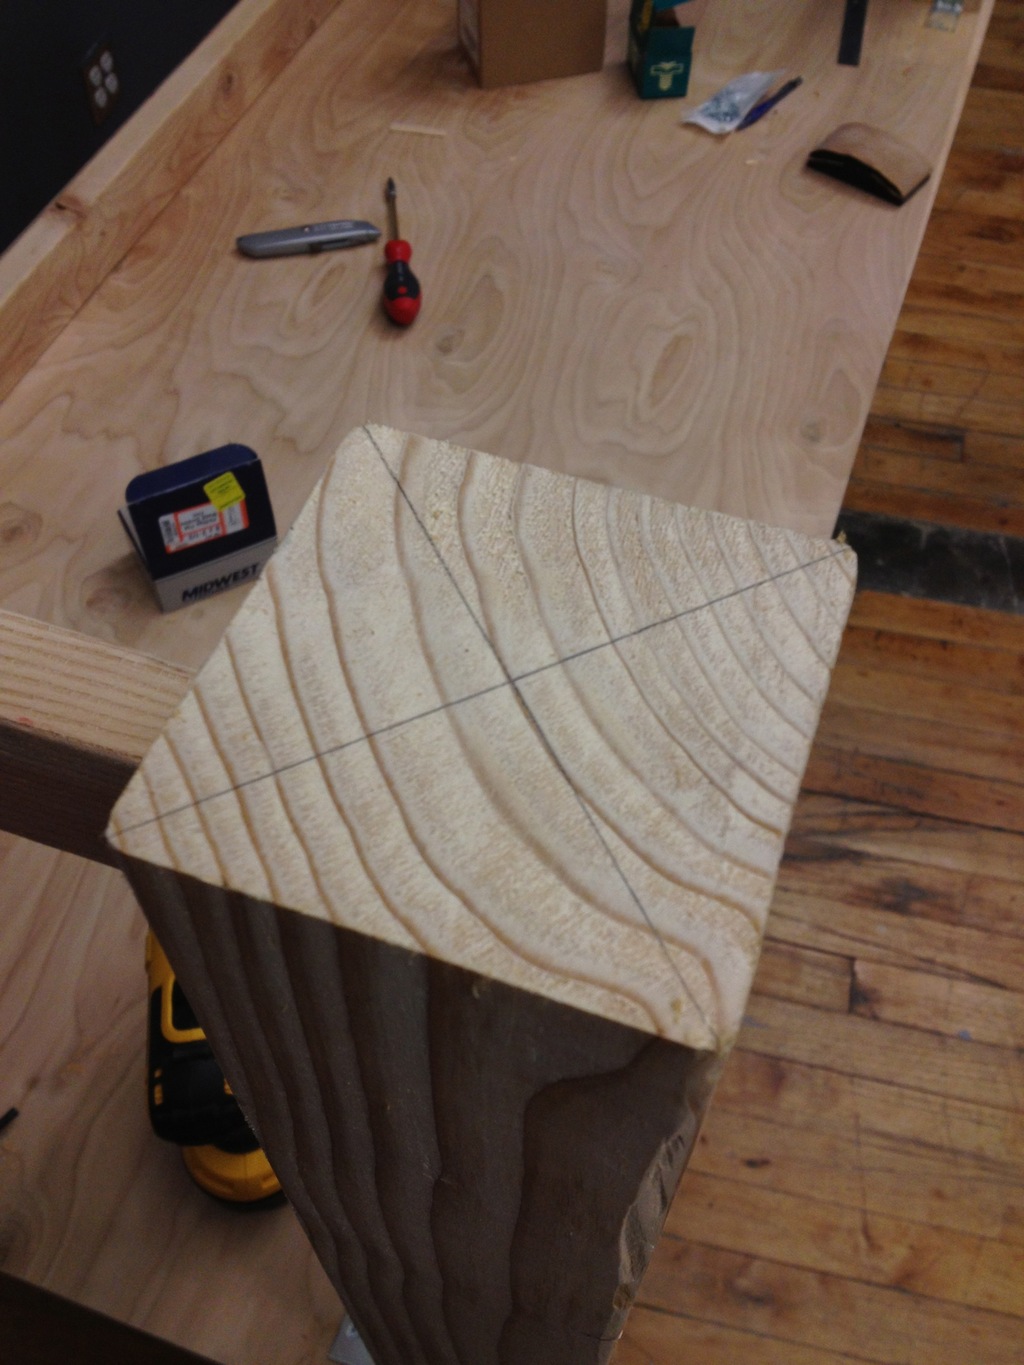
- Legs: 28.5″ x 4″ x 4″ – 4 total
- Side frame: 36″ x 2″ x 4″ – 2 total
- Rear frame: 6′ x 2 ” x 4″ – 2 total
- Top (plywood) surface: 6′ x 36″ x 1.5″ – 1 total
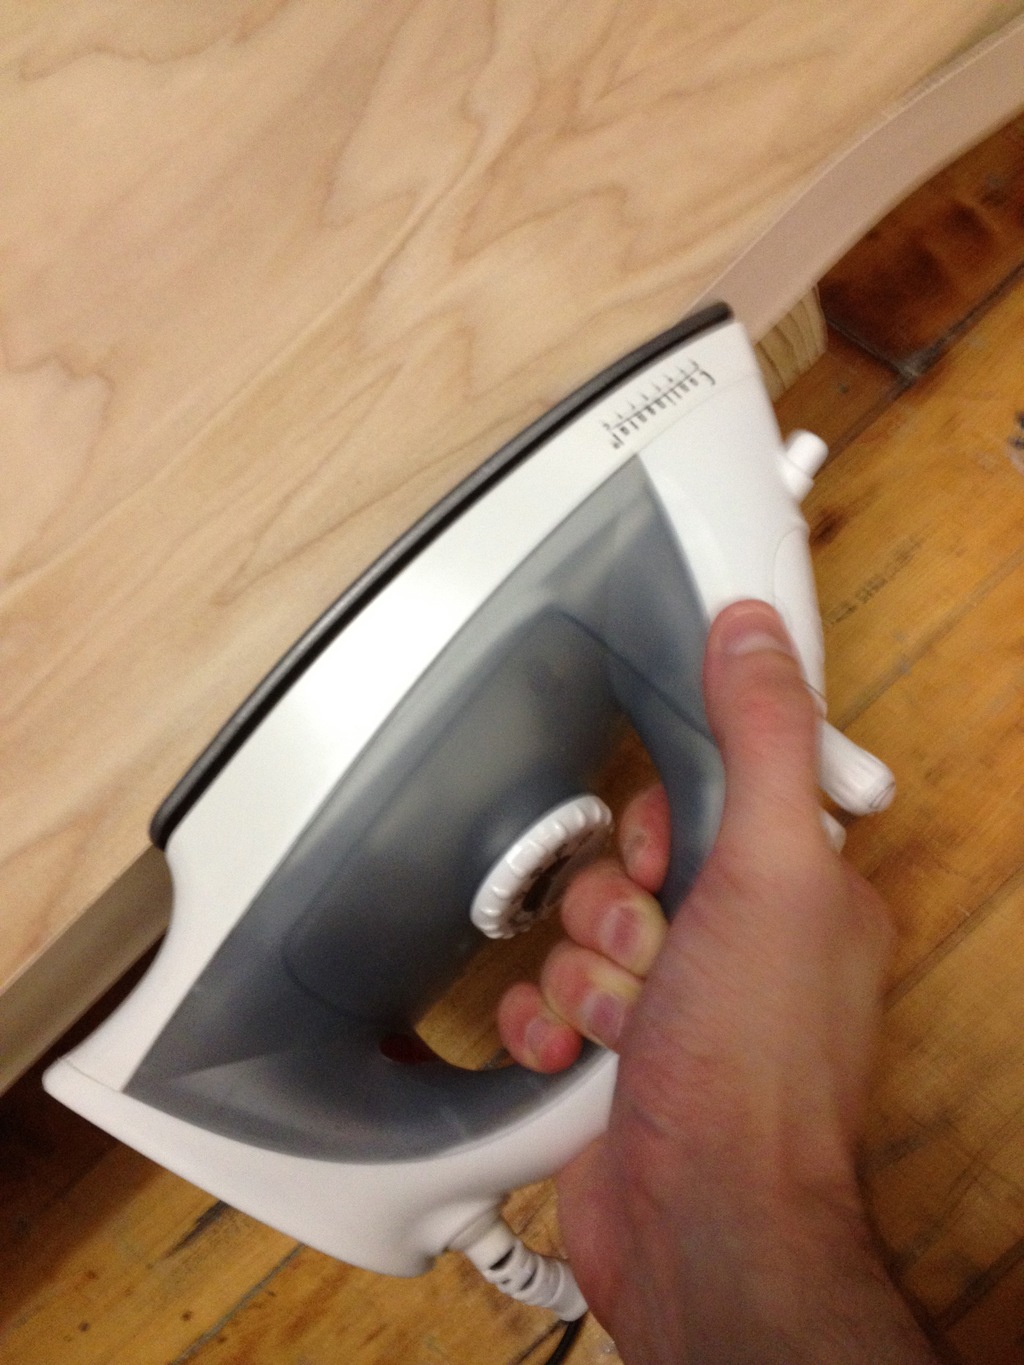
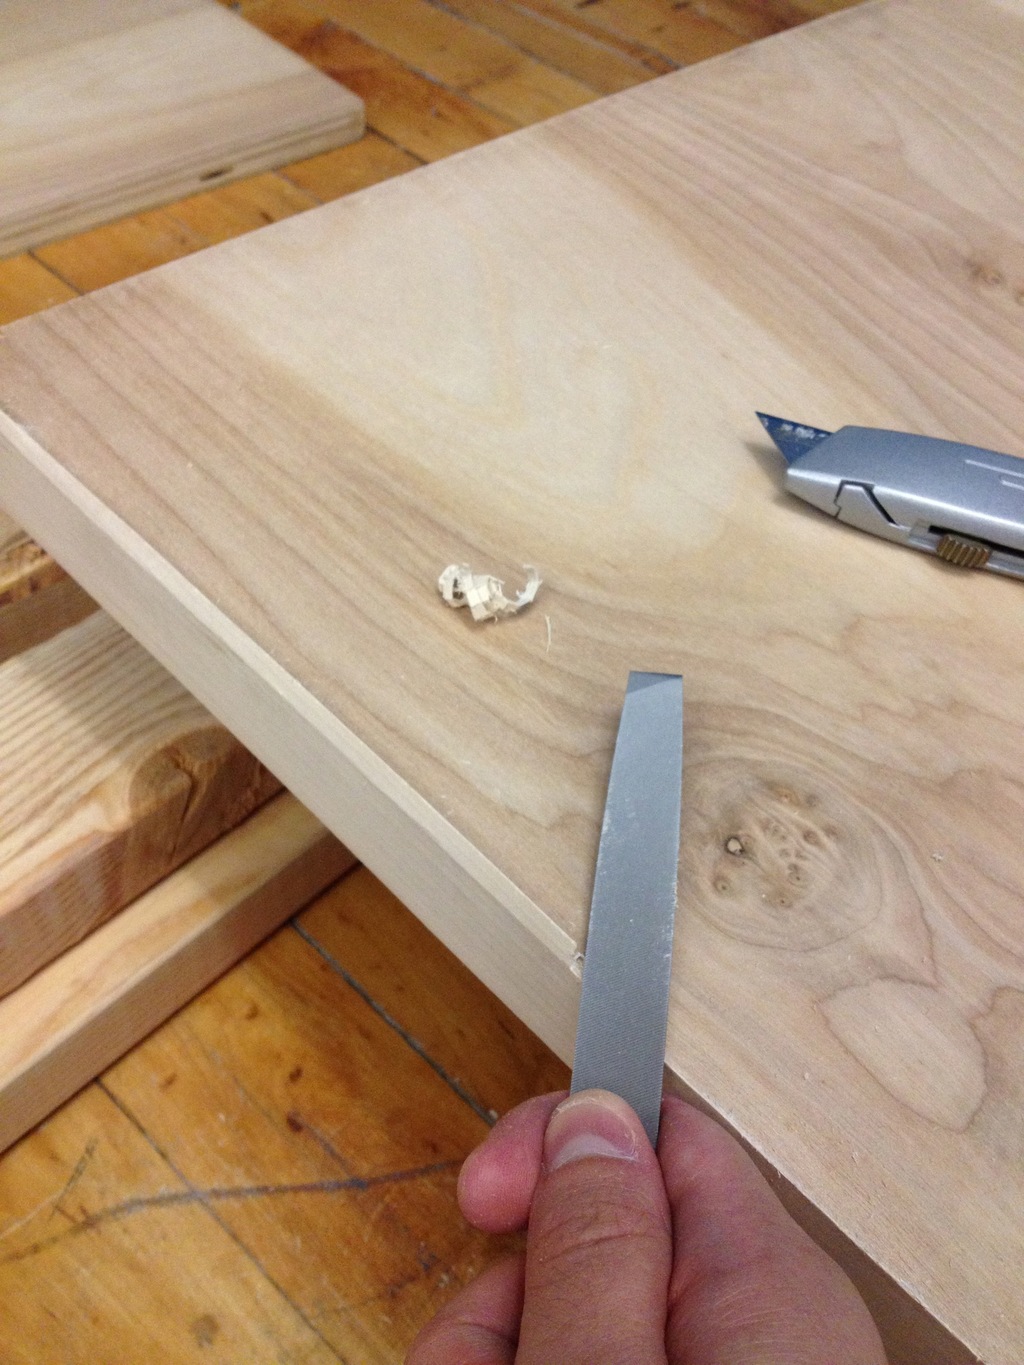
Additionally, if you use a plywood surface, I would recommend attaching veneer edge-banding to cover the rough sides. You can buy pre-glued banding that can be applied with a simple iron — you’ll need enough to cover the circumference of the desk, and I’d suggest a width at least 1/2″ greater than that of your plywood.
Hardware
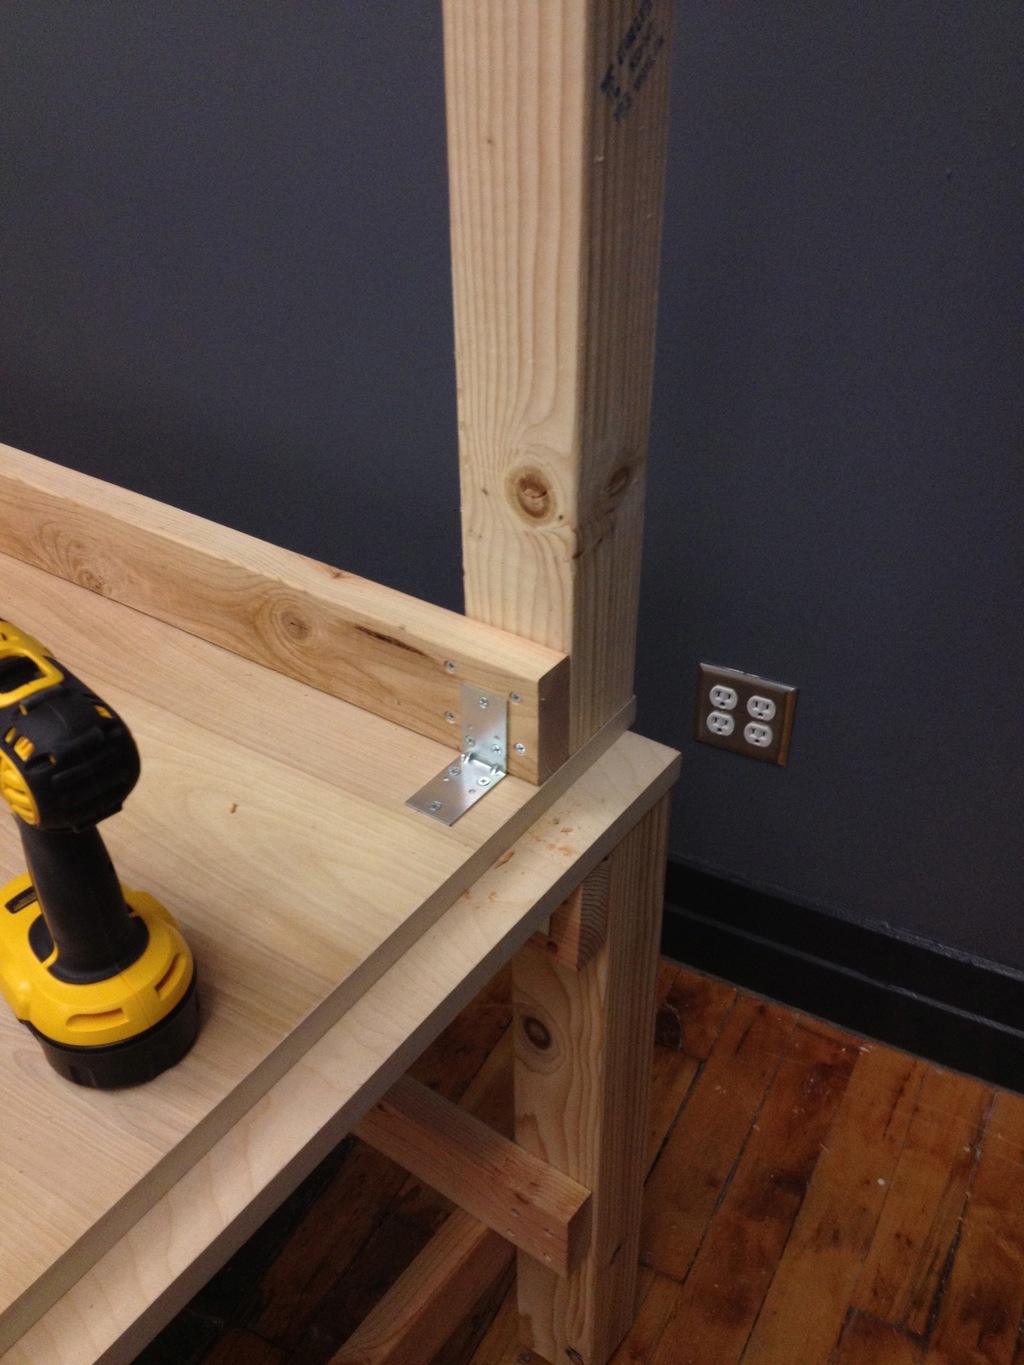
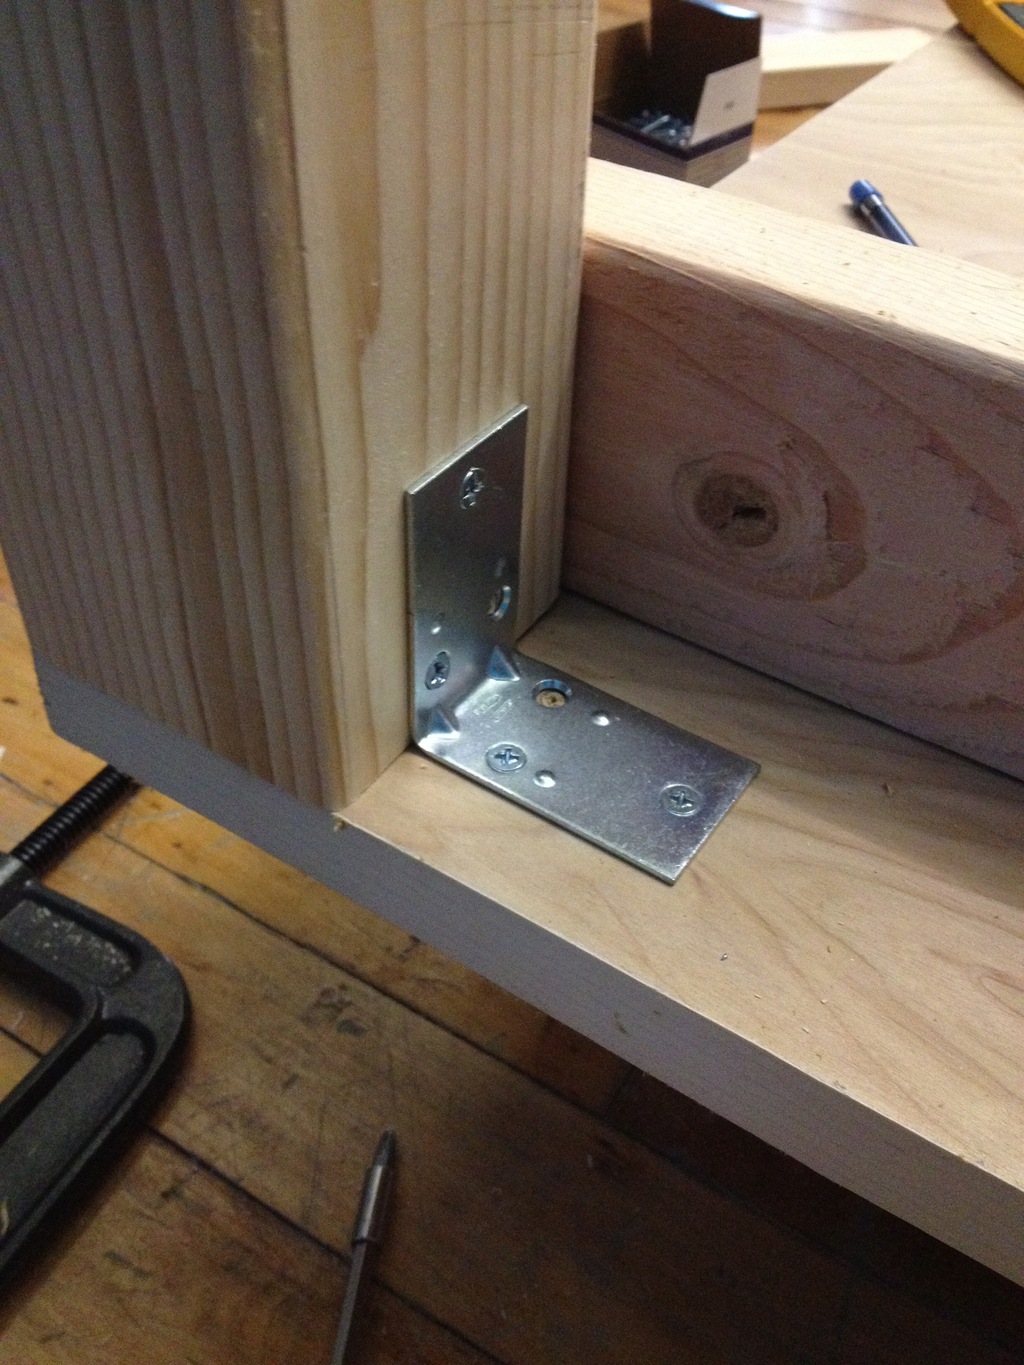
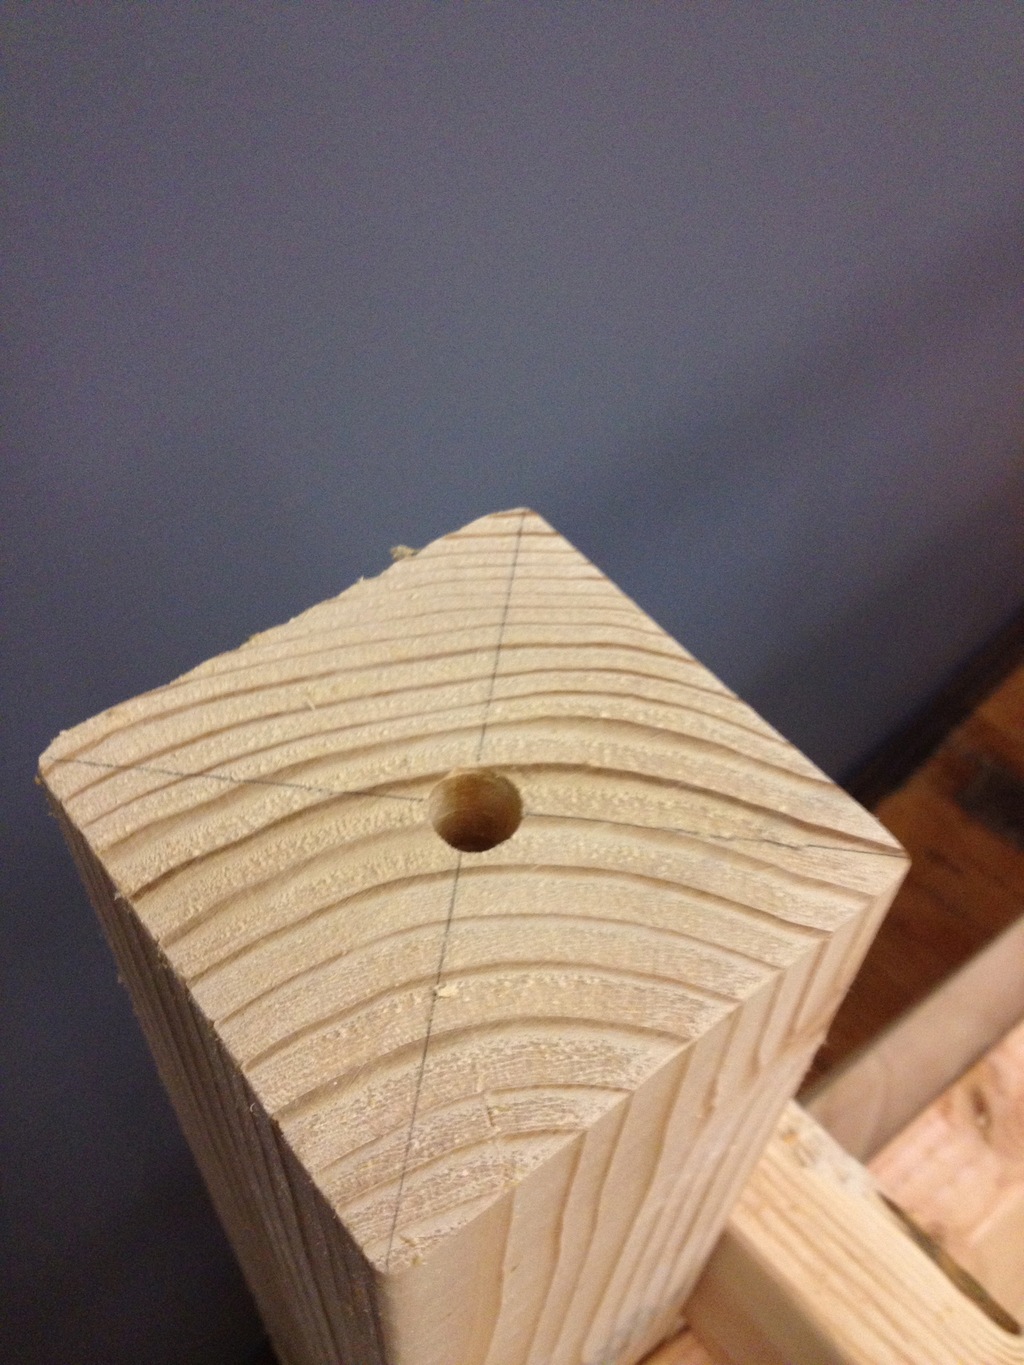
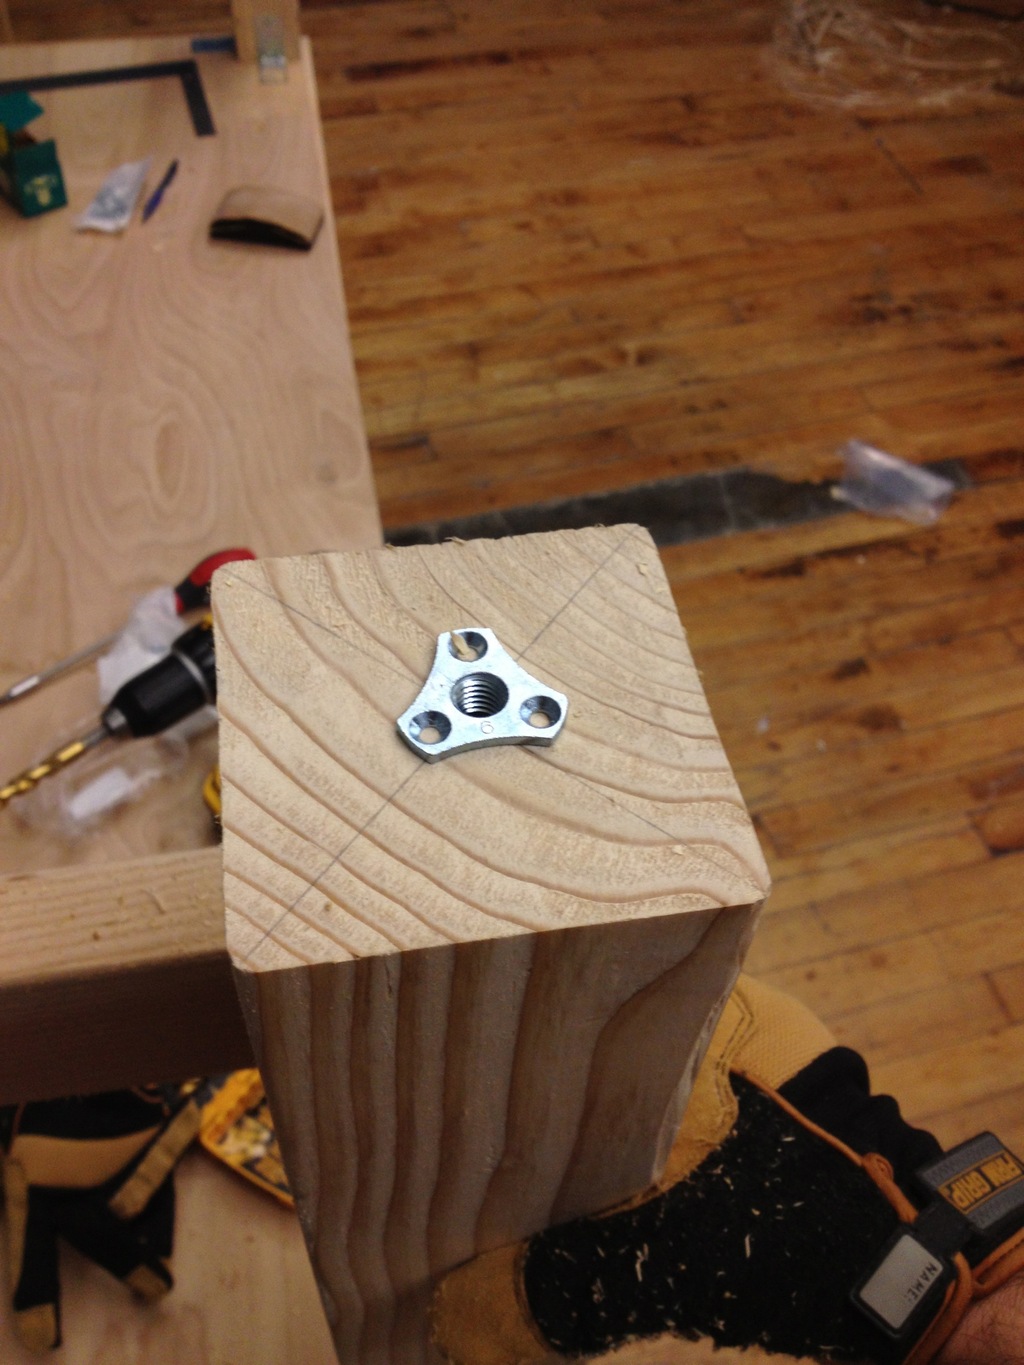
I purchased all my hardware from McMaster-Carr — it’s like a Lego store for grown-ups. The support structure of the bench is screwed directly together, and attached to the bench surface via L brackets. I also drilled out holes in the legs of the bench so that I’d be able to install leveling mounts (feet).
The full parts list follows, with links to McMaster-Carr. The part counts are for a single 6′ x 3′ work bench.
Bench Hardware:
- Brackets to attach legs to top:2-1/2″ Length Of Sides, 1-1/2″ Width L Bracket – 4 total
- Phillips Wood Screw, No 8 Size, 1-3/4″ Length – 1 box
- Phillips Wood Screw, No 8 Size, 5/8″ Length- 1 box
- Phillips Wood Screw, No 8 Size, 2-1/2″ Length – 1 box
It should be pretty obvious which screws go where based on their length.
Leveling mount hardware:
- Leveling mounts: 3/8″ #16 x 4″ thread length with 2-3/8″ Base Diameter – 4 total
- Threaded inserts: Surface-Mount Insert for Wood 3/8″ – 16 Internal Thread- 4 total
- Wood Screws: #6 5/8″ length wood screws- 1 box
Tools
- Power Drill & Bits. You’ll need drill bits for all the listed thread sizes, as well a 1″ bit to drill out channels for the leveling mounts. I highly recommend investing in a quick-change bit, as you’ll be switching back and forth quite a bit. I have a cordless Dewalt that worked out great.
- Countersink bits. Used to allow the head of the countersunk screws to sit flush with the wood surface.
- Clothes iron. Used to apply the veneer edge-banding. Any clothes iron will do, but you probably won’t want to use it on your clothes afterwards. I bought a $15 iron off of Amazon.
- Single-cut, mill bastard file. Used to trim the veneer edge-banding.


The Plausible Blog
Latest news and musings from the co-op.
Follow us: @plausiblelabs
Recent Articles
- PLCrashReporter Stewardship Moving to Microsoft September 12, 2019
- A New Home for VoodooPad December 14, 2017
- PLRelational: Query Optimization and Execution October 3, 2017
- Let's Build with PLRelational, Part 2 September 28, 2017
- Let's Build with PLRelational, Part 1 September 18, 2017